|
How do you repair fluorescent LED lamps?
Repair and fix led fluorescent lamps, led fluorescent bulbs, 2D Fluorescent LED replacement, 2g11 bulb retrofit led, H-type 2G11 LED tube to replace 2G11 CFLs. 2-G11 Retrofit LED Lamp 4-pin CFL Bulb Base Lamps Replacement 2G11, compact fluorescents, and led fluorescent suppliers.
The whole LED tube may not be working on 1FT, 2FT, 3FT, 3FT, 4FT, 5FT, and 5FT LED fluorescent lamps. The driver board is almost always the culprit.
The 8-ft led tube lamp will not work if half of it is out. Driver board fault is the reason.
This article will show you how to replace the driver board of the led fluorescent tube. Different led drivers for different price led tubes are available. They are very different. This information is important to know before you replace the led tube. Ballast Compatibility is the best quality led tube driver. Ballast compatible led tubes are fluorescent tube replacements that don't require bypassing ballast. You can also remove or not remove ballast from fixture.
1. Circuit Diagram for Simply LED Tube Light Driver:
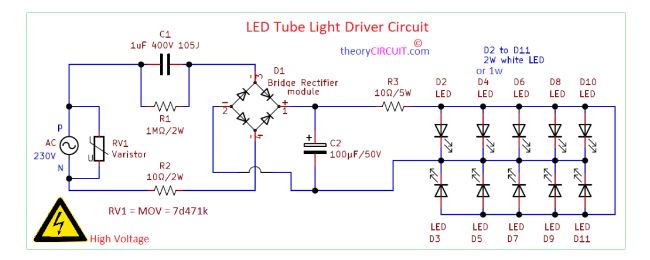
This circuit is a 230 Volt AC Direct LED Tube Light Driver Circuit. It uses only a few components. This circuit can be built as a 20 Watt or 10 W White LED Tube Light. This circuit requires you to handle high AC voltages with extreme care. It is also a Non-Isolated circuit, so don't touch it while in operation.
This AC LED Tube Light Driver Circuit connects 10 white LEDs, either 2 watts or 1 watt in parallel. These LEDs can be placed in any direction you like, including in a straight line.
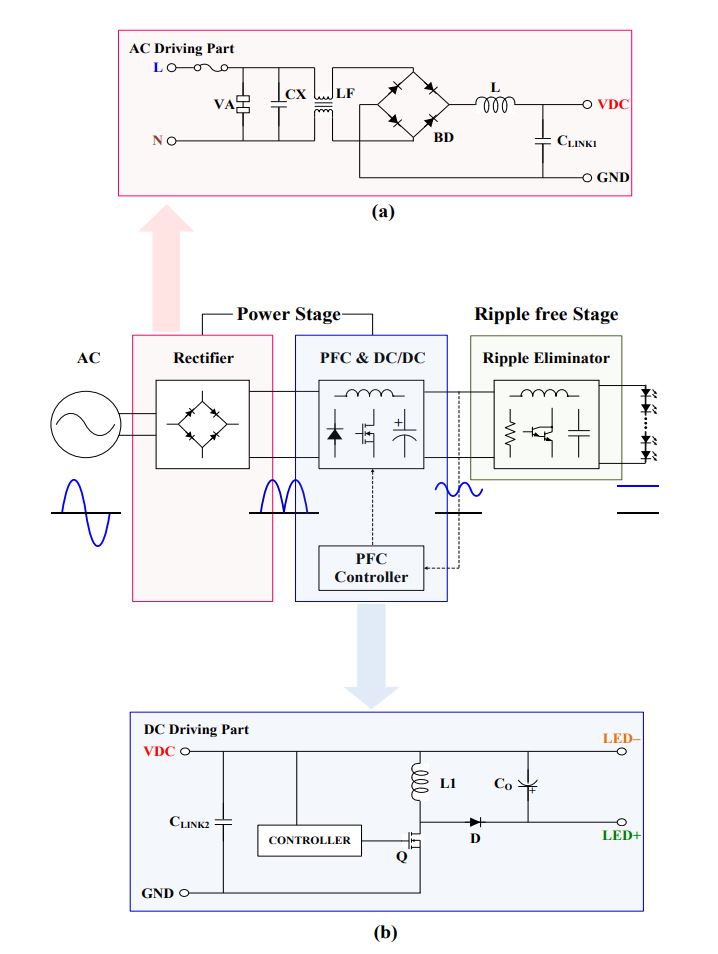
2. Circuit diagram of high quality led tube driver:
LEDs offer many advantages, including high luminous efficacy and energy saving. They also have long life expectancies. These features have enabled LED lighting to quickly replace other types on the market. The market share for LED lighting will increase as traditional lighting regulations like florescent and incandescent lamps are becoming more stringent.
An LED lighting product usually consists of two parts: an LED module and an converter. To achieve excellent optical performance, the LED converter must provide steady and precise current to the LED modules. The luminance variation of LEDs is dependent on the current supply. The LED converter must be efficient, low in power, low power factor (PF), low total distortion (THD) and low light flicker.
The driving method used to lighten LED lighting and the key components in the LED converter are the main factors determining its quality. A single-stage power factor correction or (PFC), driving method for low-power LED lightings is often used due to its simplicity and low cost. The output current has a double-frequency ripple, and light flicker can be caused by variations in the luminance. Numerous studies have shown that low-frequency light flicker can cause visual fatigue, epileptic attacks, headaches, and visual impairments.
Figure a illustrates the main stages of the proposed LED convertor. It includes a power stage for constant current control, and a ripple remover stage to reduce output ripple. The power stage can be physically split into two driving circuits that are electrically connected through the LED module. Figure b is a simplified circuit diagram for the proposed LED converter that has a separate driving circuit to power a T8 LED tube.
Wires connection of LED Tube

Tools Needed: Screwdrivers, digital multimeter, vise, soldering iron.
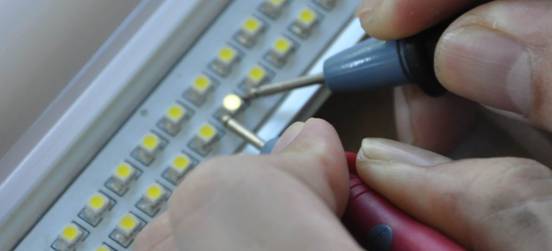
Failure 1:One series LED not work
Taking apart the tube by removing PC cover, testing the failed LED with digital multimerer, connecting the positive pole to red pen, and black pen to negative pole ( for negative pole, there is a breach.) If the LED shines, it’s not the problem for this LED, if not shines, then we can judge it’s the problem of this LED, replace this defective LED with good one, and then put PC cover back, and fix it with screws.
(as below photo)
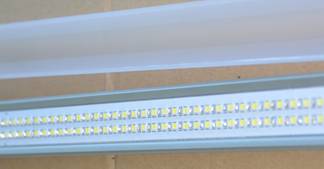
Failure 2: half of the LEDs not work
Taking apart the tube, testing the LEDs with the method mentioned on failure 1 and excluding the possibility of failed LEDs, then check if it is the problem of soldering, like false solder, losing solder, if not, then we can judge the possibility of power supply defect, then change the power supply which connect to the half not working LEDs.
Failure 3: LEDs flashing
Change the power supply
Method for taking apart the tube and replace the power supply (as below photos)
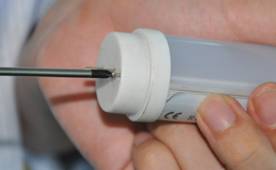 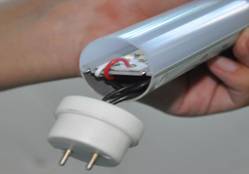
(Photo 1) (photo 2)
Taking apart screws in the two housing of the tube (as photo1)
 (Photo 3) (Photo 3)
Remove PC cover
(Photo 4) (Photo5)
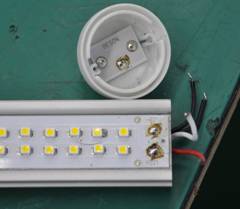
Taking down the connecting wire on the two end of the tube with soldering iron
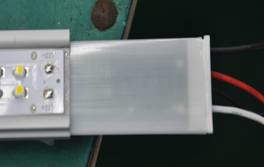 
(Photo 6) (Photo 7)
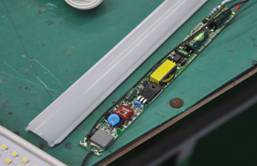
Taking out power supply, removing milky insulated sleeve, taking down wires with soldering iron and reconnect the wires to the good power supply, then welding the wire which connect the power supply and PCB, finally assemble the whole tube.
|